Flashing DS prototype firmware to real hardware
Note that there is a chance of bricking your console, and this may prevent some games from running. I am not liable for any damage caused through this guide. By following this guide, you accept that you, and you alone, are responsible for anything that happens to your console.
Compatibility:
|
040615
|
40820D
|
X2B
|
|
DS Lite
|
Works
|
Has issues*
|
Works
|
|
DS Phat
|
Works
|
Untested
|
Untested
|
*the firmware itself runs fine, but the
touchscreen won't work in games. This is likely due to using prototype touchscreen configuration.
Prerequisites:
- Flashcart
- DS phat or DS lite
- Screwdriver or tinfoil
Setup:
1. Download the 040615, 40820D, or X2B prototype firmware.
2. There should be a .bin file in your downloaded firmware. Extract it and rename it to
proto.bin.
3. Create a folder on the root of your flashcart's SD card called
firmwares and copy proto.bin to that.
4. Download fwManager.zip* at the
bottom of this guide. (this is the tool we'll use to flash the firmware)
5. Extract fwManager.nds from fwManager.zip and copy it to the
root of your flashcart's SD card.
Fixing Wireless Communications:
Each firmware copy contains WiFi board specific data that lets it connect wirelessly. This data cannot be moved from one WiFi board to another, or you will be unable to connect online or in multiplayer games. To solve this, we will back up the original data and copy it over to the new firmware we’ll be flashing.
1. Dump your DS firmware with DSBF_dump.nds. (use a flashcart for this)
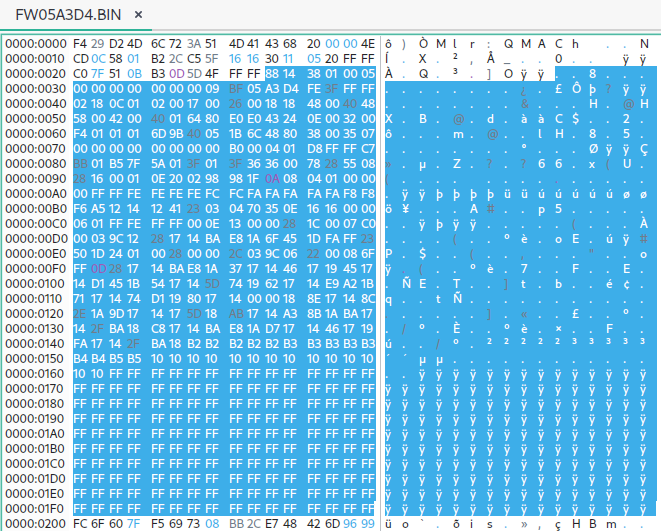
2. Open the dumped firmware in a hex editor. It will be called something like FWD7F1EE.BIN, and is found on the root of your flashcart SD card.
3. Select offset 0x2A to 0x1FF and copy it.
4. Open the prototype firmware (proto.bin) in the hex editor.
5. Select offset 0x2A to 0x1FF on the prototype firmware and paste the data from before.
6. Save and overwrite the edited firmware.
Installation:
1. Launch your flashcart on your DS, then run fwManager.nds. Follow the
on screen instructions, but don't start writing to the console!
2. If you were start writing, you'd notice that nothing happens. This is
because the console memory is write protected. To disable it, open up the
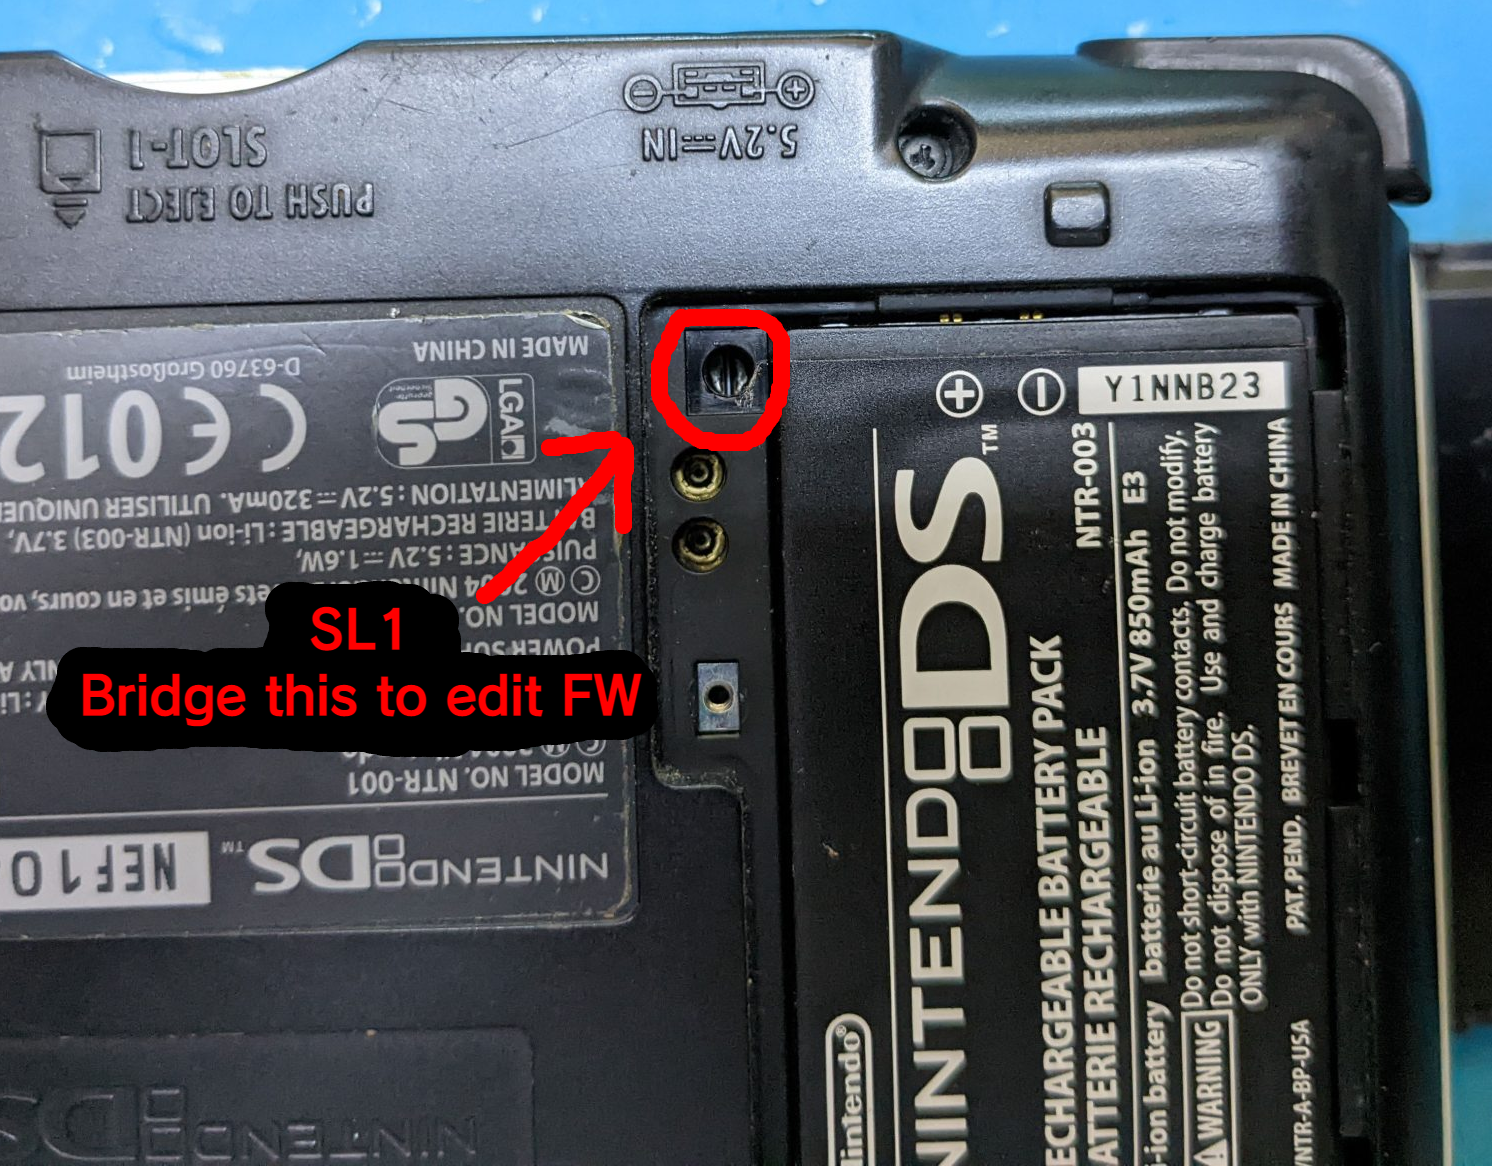
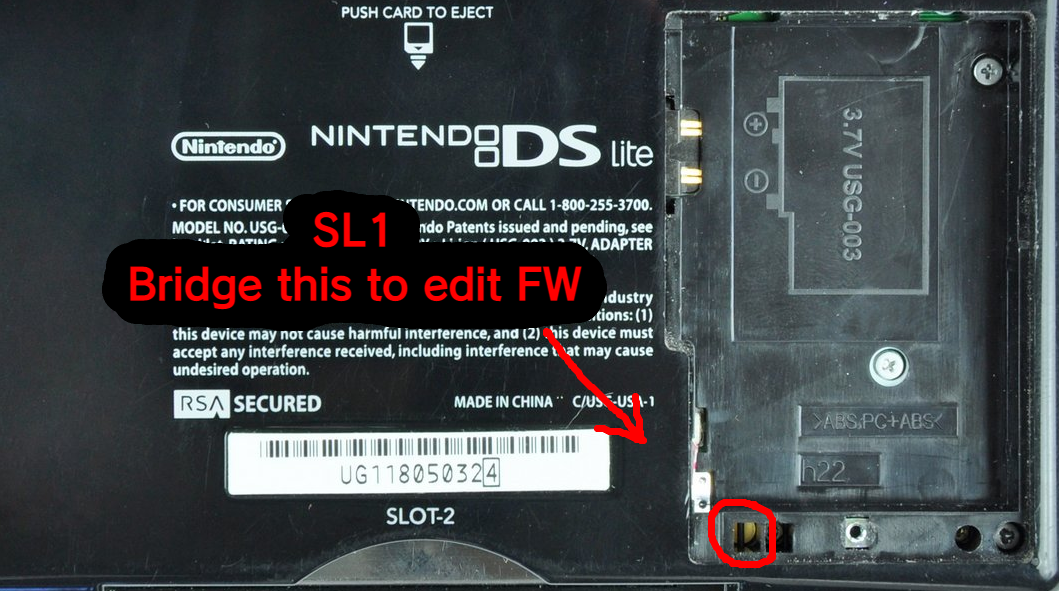
battery cover. (see below images)
WARNING: Make sure to not short a DS Lite (this can happen by touching the metal
point contacts right next to
SL1). Use an improvised tool that is insulated to the
sides and only leaves metal exposed at the tip.
3. Locate the SL1 pin. You'll notice there are two metal pads that make up the SL1. We need to bridge them (connect them together). This can be done by holding a small flathead screwdriver (or another metallic material) to both pads.
If you're unable to bride SL1 by hand for the duration of writing, you may want to consider soldering SL1 together. This is most useful if you intend on doing a lot of flashing in the future.
ANOTHER WARNING: DO NOT remove the battery at any time during writing. You will BRICK YOUR CONSOLE (see the green text below for unbricking)
4. Once bridged, you may start writing. You must keep SL1 bridged for the
entire writing process.
5. When the writing is complete, unbridge SL1 and
reboot the console.
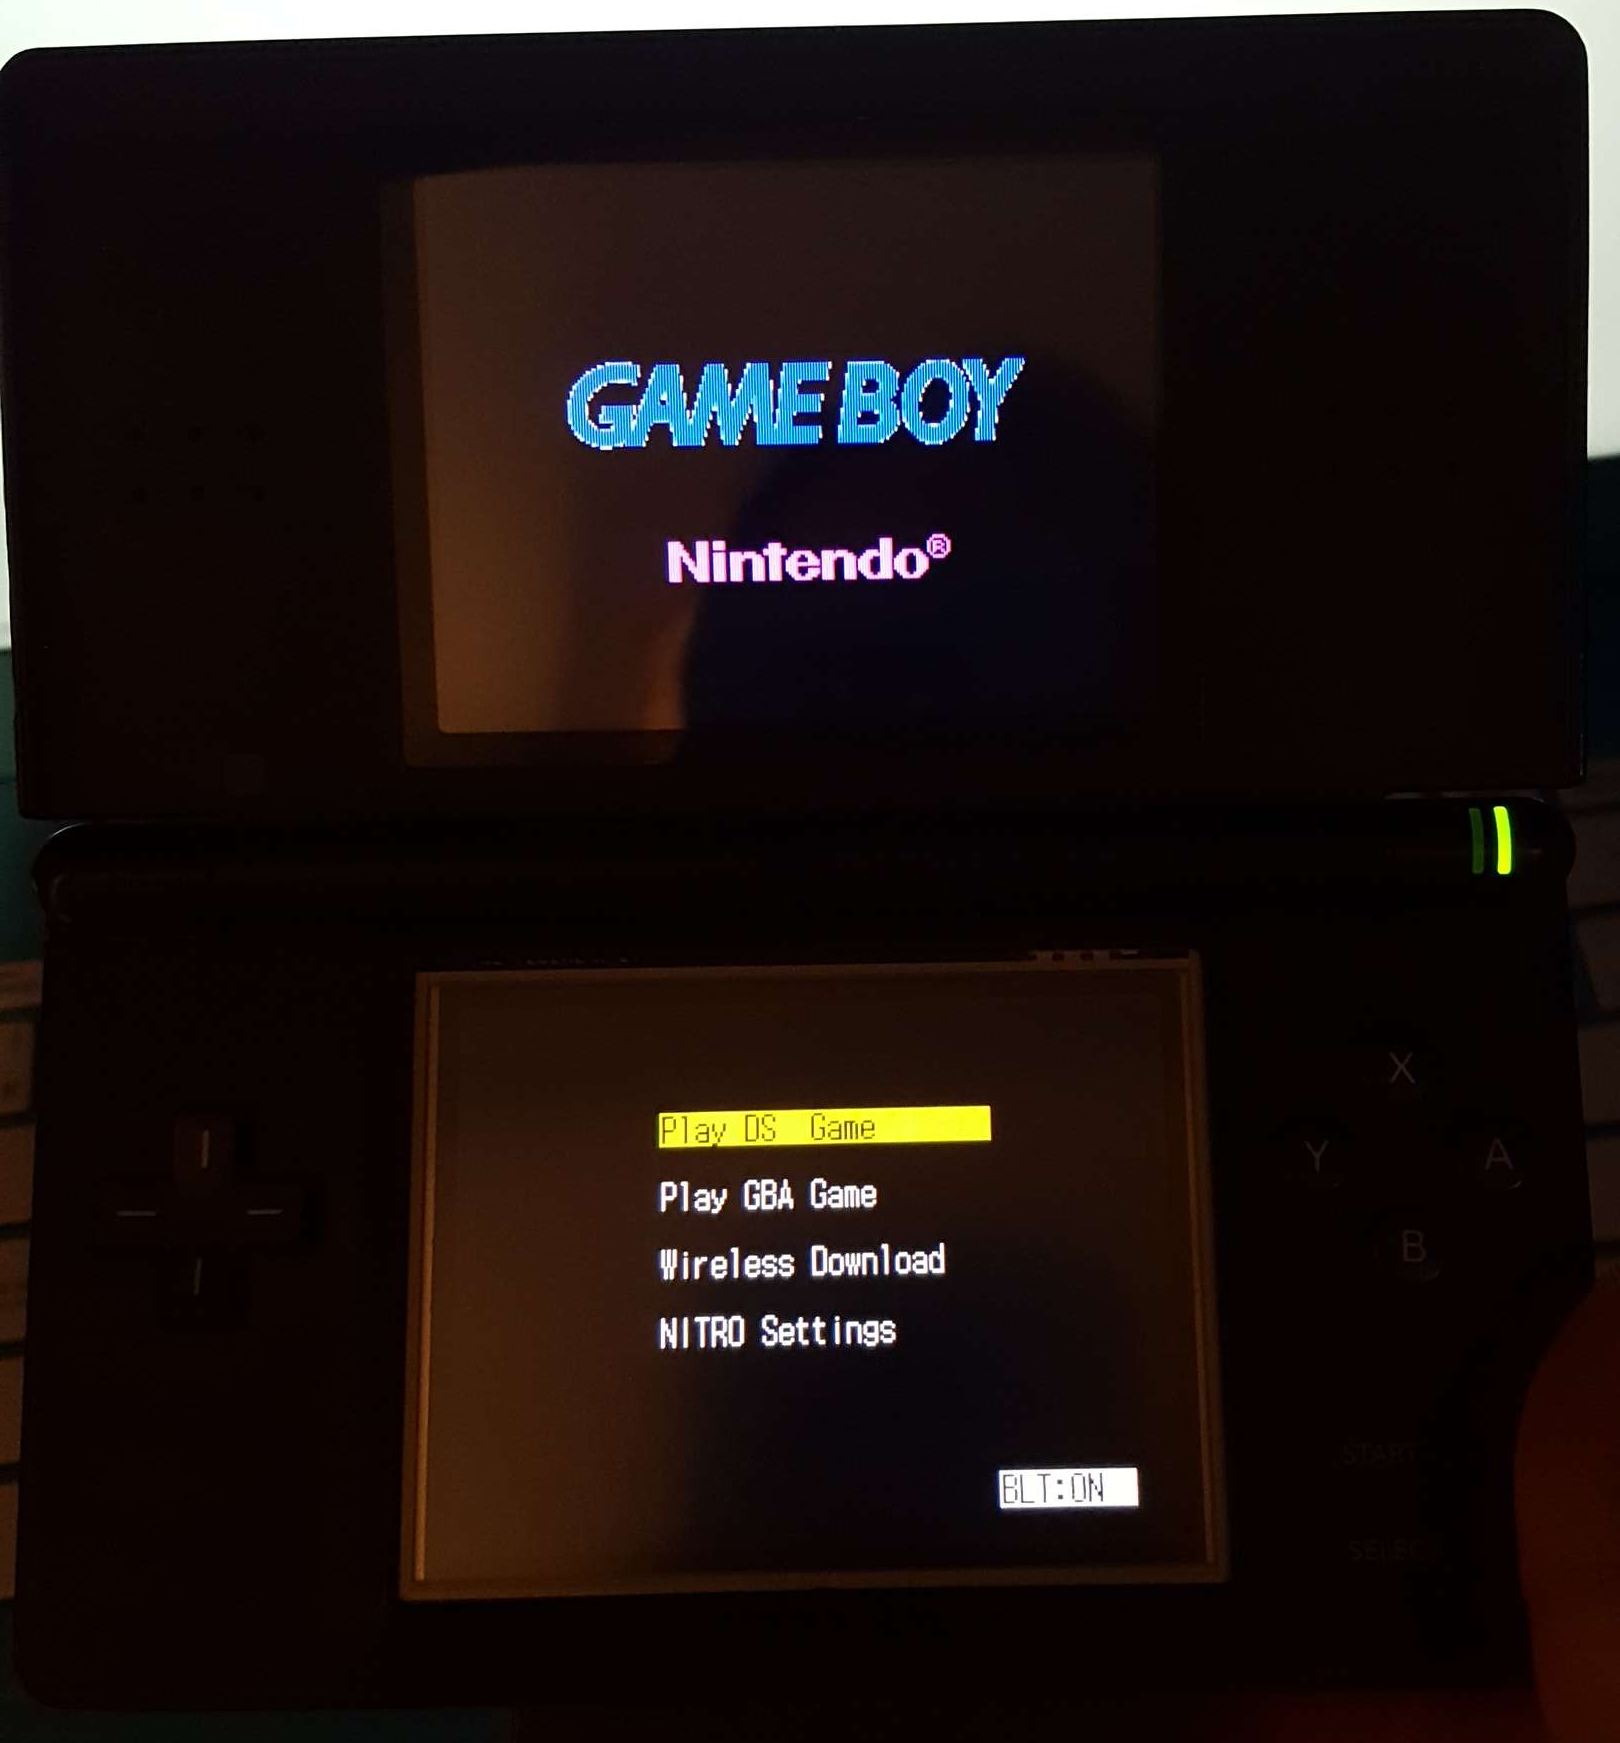
Your console should now boot to the prototype firmware (it
may take a couple seconds to load). If your console does not boot after a long
period of time, you've likely bricked it. But don't worry,
YOU CAN UNBRICK YOUR CONSOLE! Refer to
this blog entry for info on how to restore a bricked DS.
*I only included a compiled version because the
original creator required you to build everything yourself. Credits go to them
for creating the flashing tool
https://github.com/CTurt/CFW-Suite
Guide originally written for GBAtemp on 2022/12/24. Instructions and testing by
rvtr / rmc (that's me!).
Thanks to
KleinesSinchen on GBAtemp for guide suggestions!